Saturday, 2 November 2013

JavaScript Popup Blocker for Chrome takes care of popups on sites like LiveTV

JavaScript Popup Blocker for Chrome takes care of popups on sites like LiveTV

The majority of modern web browsers come with popup blockers that take care of several common types of popups that you may run into on the Internet.
You may encounter sites and services that use different techniques to spawn popup windows in the browser that are not blocked by the default popup blocking mechanics.
One basic example are popups that are launched as soon as you click anywhere on the site.
These popups are usually created using JavaScript and while browser extensions such as NoScriptmay help as they prevent JavaScript from being run by default, they may also limit the site's functionality at the same time.

JavaScript Popup Blocker
javascript popup blocker
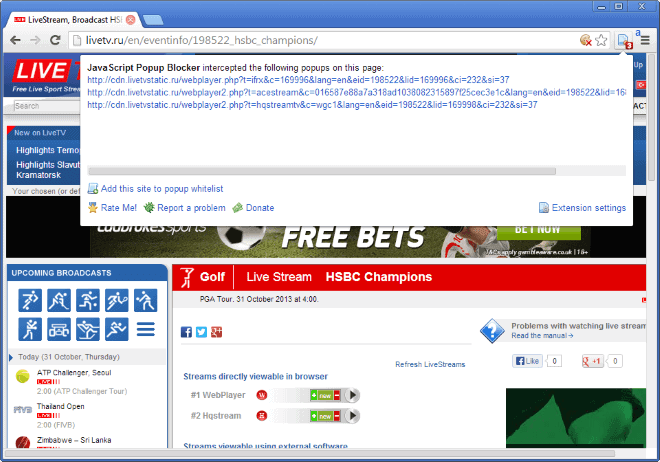
Chrome users can install the JavaScript Popup Blocker extension which adds advanced popup blocking capabilities to the web browser. While there is no guarantee that it will take care of all popups that you may run into on the Internet, it takes care of several annoying forms of popup windows including popups that are spawned when you click on a page element on a website.
The extension displays an icon in Chrome's address bar that highlights the number of popups that it has blocked on the active website.
You can click on that selection to see all those popups, which can come in handy if you need to open one of them. Some websites use popups for certain features, such as downloads, and if you block them, you won't be able to use those functionality.
A site that bombards you with popups is the live streaming website Livetv which not only uses them to launch the player window, but also to spawn a lot of popups regularly while you are watching the stream.
You will notice that the Chrome extension blocks the streaming window popup on the site as well, but that is easily fixed by launching it manually with a click on the extension's icon and the selection of the right blocked popup window from the list.
Popups are not spawned anymore in the player window and while you will still see lots of ads, it is less annoying than having to deal with ads and popups on the site.
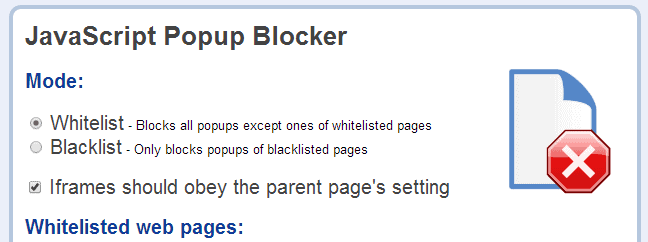
JavaScript Popup Blocker ships with options to whitelist websites, so that popups are allowed on those. You can use wildcards * when you add websites, which may be useful for sites that use popups for part of their functionality.
chrome block popups
If you do not like the "block all" approach of the application, you can alternatively switch to a blacklist only setting. Here only popups that you have added to the blacklist are blocked, while all others are allowed.

Verdict

JavaScript Popup Blocker is a handy extension for the Chrome browser that gives you better control over popups in the browser. The whitelist approach is probably best for the majority of users, as it blocks all popups except on pages that you have explicitly whitelisted in the options.
Since it is possible to open any blocked popup window with a click on the extension's icon, you are not losing any functionality in this regard. And if you run into the same blocked popups regularly, you can easily whitelist them to make things more comfortable for you.

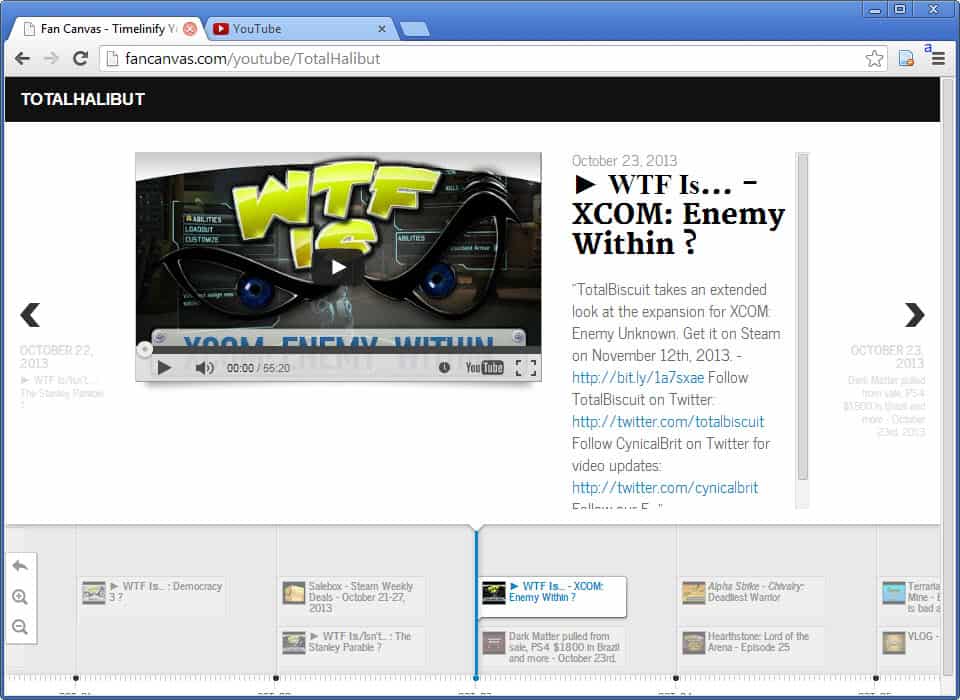
Fan Canvas visualizes a YouTube user’s video history

Fan Canvas visualizes a YouTube user’s video history

If you follow a couple of video producers or people who upload videos on YouTube you may have encountered situation where you want to browse the latest videos released by them, or videos released in a particular time period.
While you can do so with a couple of clicks, the interface that YouTube provides you with is not well suited for that task, as you have to browse from the latest videos all the way down to the videos that you want to see.
That may result in a lot of clicks for you depending on when the videos that you are interested in have been published to the account.
Fan Canvas is a new third party service that lets you browse a YouTube user's video history visually. All you need to do is type or paste the username of the YouTube user in the form on the main page on the website to get a visual representation of all public videos that were uploaded to YouTube by the account.
Note: The service seems to limit the total number of videos that it displays in the timeline to 25. That's a severe limitation that reduces the service's usefulness significantly. There are no configuration options to change that, and it is not clear if the limit will be removed in the future.

Fan Canvas

fan-canvas
The service displays a timeline of videos at the bottom of the browser window, and the actual videos that you have selected on top of it. You can scroll the timeline by holding down the mouse button in the timeline interface and drag motions to the left or right, or by using the back and forward buttons up top.
You can play any selected video right away on the screen, and also read the description that was posted along with it.
Depending on the upload frequency of a user, you may want to compact or extract the timeline. Compacting will increase the time interval that is starting with days, so that you will end up with a monthly view in the end. This can be useful if a user has not uploaded that many videos to the site.
The opposite is true if you select to extract the timeline, as you will have greater control over timelines that display a lot of videos.
There is also a bookmarklet available that you can make use of.

Verdict

The limitation makes Fan Canvas an interesting proof of concept service. It will remain that unless the video limit is removed by its developers.
While it is still good to get a quick overview over the latest videos uploaded to a particular account, it cannot be used currently to browse the complete history of a user on YouTube

How to disable SkyDrive in Windows 8.1

How to disable SkyDrive in Windows 8.1

The Windows 8.1 operating system is a step in the right direction for Microsoft for the most part. While it does not get rid of all the annoyances that shipped with Windows 8, it takes care of some and improves the system's usability in many ways.
Not everything has improved though, and one of the areas where you may notice this is Microsoft's file synchronization service SkyDrive.
Unlike before, SkyDrive is now part of the operating system and if you are using a Microsoft account, you are having access to storage automatically.
While that sounds great in theory, the integration does not replicate all the features that the desktop version of SkyDrive offers. One missing feature is the remote fetch option, which you can use to retrieve files from a remote computer provided that it is connected to the Internet.
Another SkyDrive's Smart Files feature which displays virtual representations of files on Windows 8.1 instead of the files themselves. While that includes metadata that will be used in searches that you perform on the system, you will have to download the files when you want to access them. It is possible to make all files available offline, but that requires manual work on your part.
If you do not use SkyDrive on the system, you may want to consider disabling its functionality completely to free up space in File Explorer and hide it from dialogs in the operating system. Windows 8.1 ships with options to disable SkyDrive completely on the system, so that it cannot be used anymore as storage.
Note: Even if you disable SkyDrive in Windows 8.1, you won't be able to install the SkyDrive desktop application on the system. The installer will run and exit shortly after that without installing the desktop app on the system.

Disable SkyDrive in Windows 8.1

You have two options to disable SkyDrive in Windows 8.1. The first requires access to the Group Policy Editor, which is not available in all versions of Windows 8.1, while the second uses the Registry to make the change.
Group Policy Editor
disable skydrive windows 8.1
If you have access to the Group Policy Editor, do the following to launch it and turn off SkyDrive:
  1. Tap on the Windows-key to go to the start screen interface if you are not already there.
  2. Type gpedit.msc  and select the first result from the list.
  3. This opens the Local Group Policy Editor.
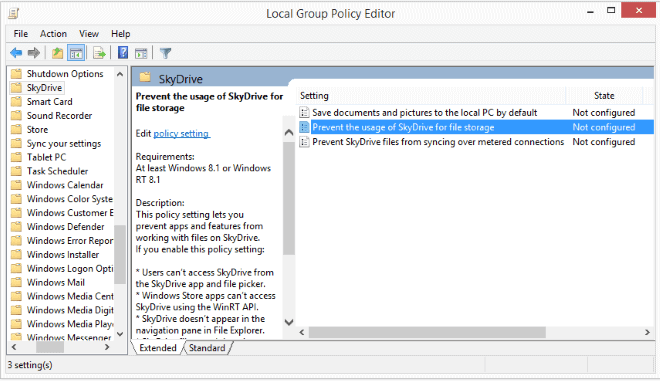
  4. Navigate to the following folder: Local Computer Policy > Computer Configuration > Administrative Templates > Windows Components > SkyDrive
  5. Locate "Prevent the usage of SkyDrive for file storage" and double-click on the entry.
  6. Switch its state from "not configured" to "enabled" and click ok.
To turn it back on, repeat the process but switch the state from "enabled" to "disabled" or "not configured" instead.
This policy setting lets you prevent apps and features from working with files on SkyDrive.
If you enable this policy setting:
Users can't access SkyDrive from the SkyDrive app and file picker.
Windows Store apps can't access SkyDrive using the WinRT API.
SkyDrive does not appear in the navigation pane in File Explorer.
SkyDrive files aren't kept in sync with the cloud.
Users can't automatically upload photos and videos from the camera roll folder.
If you disable or do not configure this policy setting, apps and features can work with SkyDrive file storage.
The Registry
disable skydrive registry
If you do not have access to the Group Policy Editor, you can make the same change in the Windows Registry instead.
  1. Tap on the Windows-key to go to the start screen if you are not there already.
  2. Type regedit and select the regedit.exe result.
  3. Confirm the User Account Control prompt that is displayed.
  4. Navigate to the following key: HKEY_LOCAL_MACHINE\SOFTWARE\Policies\Microsoft\Windows\Skydrive
  5. You may need to create the Skydrive folder here. If you do, right-click on Windows and select New > Key and name it Skydrive.
  6. Right-click on SkyDrive and select New > Dword (32-bit value) and name it DisableFileSync.
  7. Double-click the new parameter and change its value to 1.
  8. Sign out and back in again.
If you want to enable SkyDrive again, change the value of the parameter to 0. (via Windows Club)

Wednesday, 30 October 2013

Facebook asking locked out users to provide Government ID

Facebook asking locked out users to provide Government ID

If you have opened Twitter today you may have noticed an increase in messages reporting that the social media site Facebook was asking them to provide a Government ID to unlock their account on the site.
The message that users received during log in to their Facebook account states the following: "For security reasons your account is temporarily locked. If this account reflects your real name and personal information, please help us verify it".
The user who has been temporarily locked out of the account is then asked to provide a government ID for verification.
Facebook itself has not published a public comment yet and it is unclear if the company will address the issue at all.

Facebook Government ID

facebook government id
Facebook's Help page provides further information about the practice:
If you can't verify your account using your mobile number, you'll need to provide a copy of your photo ID. This could be a scanned copy or a close-up photo you've taken.
upload a photo id
Facebook government ID
Upload a photo ID
How to upload your ID
  • Optional: Cover up any confidential information (ex: license or passport number)
  • Scan or take a picture of your ID with your digital camera
  • Make sure you can clearly see your name, birthday and photo
  • Save the photo to your desktop
  • Click the button below and follow the instructions to upload your ID
This is my government issued ID. I understand I won't get help with my account if I haven't uploaded a valid ID.
The very same page lists the types of IDs that Facebook accepts:
  • Birth certificate
  • Driver's license
  • Passport
  • Marriage certificate
  • Official Name change paperwork
  • Personal or vehicle insurance card
  • Non-driver's government ID
  • Green card, residence permit or immigration papers
  • Social Security Card
  • Voter ID Card
In addition, Facebook will also accept any of the two following items that must show the name and date of birth of the locked out Facebook user.
  • Bank statement
  • Bus card
  • Check
  • Credit Card
  • Employment verification
  • Library card
  • Mail
  • Magazine subscription stub
  • Medical record
  • Membership IDs
  • Paycheck stub
  • Permit
  • School card
  • School record
  • Utility bill
  • Yearbook photo
The company notes that data that has been uploaded to Facebook as part of the verification process will be deleted after the verification.
The mass lock-out of users is not the first on Facebook. The most recent lock-out that requested users to provide Facebook with IDs to unlock the account again happened in January of this year. The company back then stated that it may ask users for photo IDs depending on the violation that occurred.
Common violations where this may be the case are accounts where either the name or birth date do not match or exist at all (for instance if a nickname is being used), and maybe also at times to verify account ownership after a hacking attempt.
The only two options that locked out Facebook users have is to either comply with the request and transfer a picture of a photo ID to Facebook, or stop using the site altogether

Fix Google Chrome: Adobe Reader is not allowed when loading pdf documents

Fix Google Chrome: Adobe Reader is not allowed when loading pdf documents

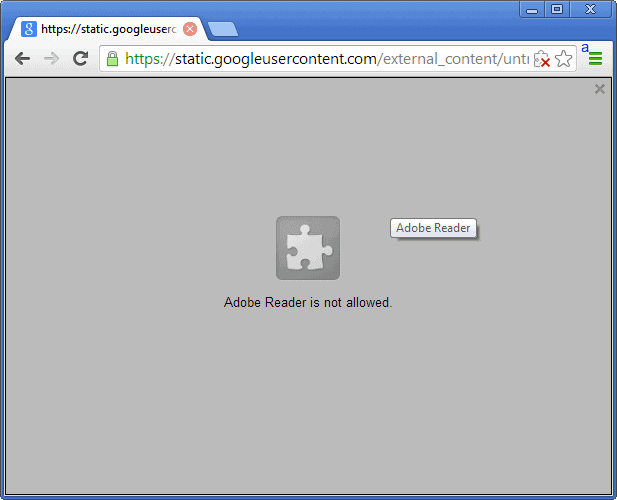
If you are running the Google Chrome Canary web browser you may have stumbled upon a new inconvenience in the browser when you are trying to load pdf documents in it. Instead of displaying the contents of the document inline -- that is in the browser's tab -- you are presented with the information that "Adobe Reader is not allowed".
You are probably wondering what is up with that and why the message appears on your screen, when it worked fine the last time you opened a pdf document in the Chrome browser.
Well, Google changed the way the Adobe Reader plug-in is handled in the browser if you have disabled the integrated Chrome PDF Viewer that ships natively with the operating system.
adobe reader is not allowed
The core reason for disabling the Chrome PDF Viewer in the browser is to use a different PDF reader in it instead. Adobe Reader is one of the plug-ins that can be used for that.
Chrome users won't receive the message if they have the PDF Viewer enabled, as it is then used to render the PDF document in Chrome.
You may also notice that you can only have one PDF plug-in enabled at a time. If you enable Chrome PDF Viewer, the Adobe Reader plug-in will get disabled automatically, and vice verse.
You have three options to fix the issue that you are experiencing:
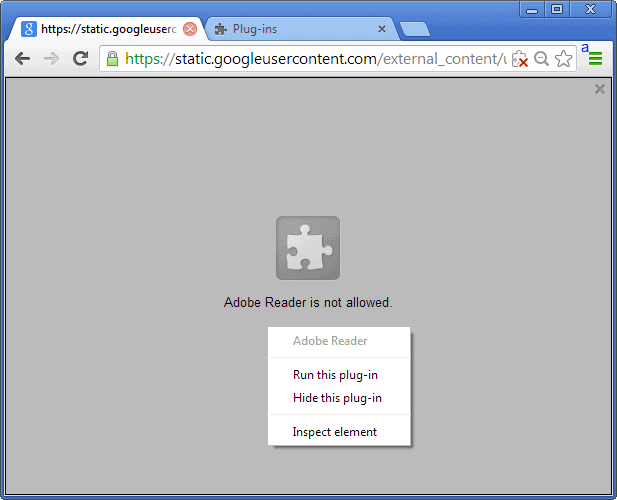
Right-click on the page with the "Adobe Reader is not allowed" message and select Run this plug-in from the context menu. This loads the document for the time being, but will block it again on consecutive runs
run this plug-in
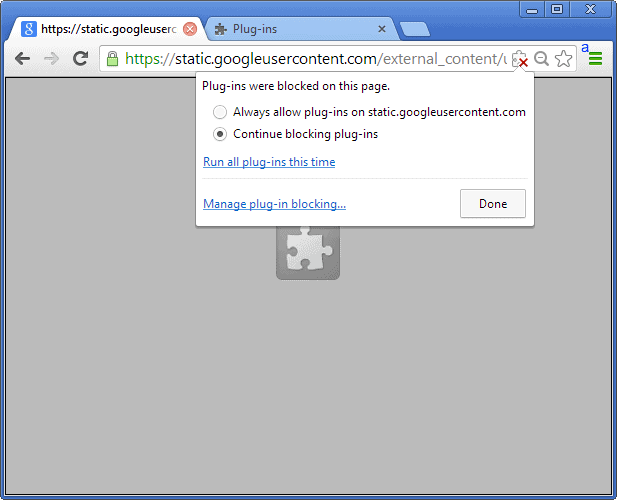
Left-click on the red x icon in the browser's address bar and select "Always allow plug-ins on 'domain name'". This whitelists the domain name you are on, but will block the plug-in from running immediately on other sites.
always allow on this page
The third and final option that you have is to load chrome://plugins in the browser, locate the Adobe Reader plug-in there on the page, and check the "Always allowed" box underneath it. This enables the plug-in on all websites so that PDF documents are again loaded automatically when you load them in the browser.
Background information: The reason for the change is Google's phasing out of all NPAPI plug-ins from 2014 on. What this means basically is that you will be able to use the Adobe Reader plugin until Google makes that policy change in 2014 in the Chrome browser. From that moment on, that plug-in, and all others that use NPAPI, won't work anymore in the browser.
What this means for users of the browser is that their only option to view PDF documents in Chrome will be Google's own PDF Viewer. There won't be another way unless extensions come along that integrate the functionality into the browser.
If you want to view PDFs in Adobe Reader or another PDF reader, you will need to download those to your system first before you can view them.

Google sign ins have become a tad more difficult for multi-account owners now

Google sign ins have become a tad more difficult for multi-account owners now

Usually when you sign in to an Internet service or site like Gmail, you are asked to enter your username or password to do so. And if you have configured two-factor authentication, you may also be asked to provide the second code to complete the login process and access account data.
Google recently changed how you log in to its products, and if you happen to be a multi-account owner, not for the better. Multi-account in this regard means that you have access to multiple Google accounts that you switch between regularly.
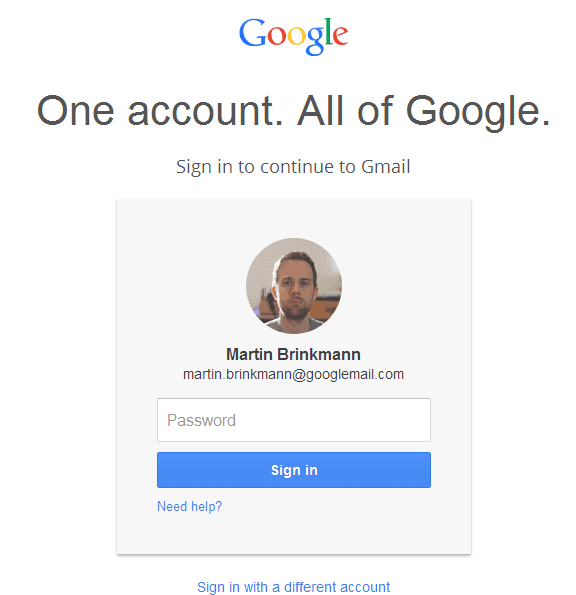
The sign in form has changed significantly, with the most important change being that Google is now displaying your username (your email address usually) in the username field by default so that you cannot change it anymore.

The new Google sign in page

google gmail account sign-in
One account. All of Google.
Sign in to continue to Gmail.
Sign in with a different account
If you are just using that account, that is not that big of a change as you just have to type your password to sign in to the service.
The problems start when you want to use a different account to sign in. Say, you have a work and home account, or a friend wants to sign in, or you use multiple accounts to access different Google products. Whatever the reason, you may notice that the only way to go forward with signing in with a different Google account is to click on the "sign in with a different account" link underneath the login form.
If you now thought that Google is displaying a username and password field for your to log in to the selected Google service regularly, you are wrong.
Instead, you are taken to a "Choose an account" page where you can select from accounts that you have previously signed in with, or pick a new account by clicking on the add account link on that page.
choose an account
Only when you click on the "Add account" link, you are taken to a page where you are allowed to enter an alternate email address and password that you want to sign in with.
Each account that you add this way is added to the list of accounts that you can switch between. So, whenever you want to change accounts, you need to perform the very same steps to do so. Instead of clicking on "add account" on the "choose an account" page, you may select an account that you have previously added. That too requires you to go through the process, so instead of being able to sign in with a different account directly, you need to click twice before you can do so.
Options
You have three options to change this behavior. While you cannot undo the new Google sign in page at all, you can:
  1. Clear all Google related cookies whenever you want to switch accounts to clear the email field so that you can type in the email and password field on the Google sign in form.
  2. Use a different web browser or a different browser profile to use multiple accounts without going through the process.
  3. Use a browser extension that enables you to use different accounts by using separate sets of cookies for these accounts.

Closing Words

While Google is usual

Tuesday, 29 October 2013

Diagnose why you can’t connect to servers or sites

Most programs that you use to connect to servers or site on a local network or the Internet display only basic information when a connection attempt fails.
These basic information are usually not enough to find out why the connection failed, and while it sometimes helps to try again, you often need to troubleshoot the issue to find out what is happening.
Operating systems ship with tools that let you do so. You can use basic commands such as ping or tracert for example to find out more about a connection.
The free cross-platform application Why Can't I Connect? has been designed to resolve TCP/IP connection errors.

Diagnose connection errors

why cant I connect
The free program displays a blank screen on startup. You need to use the file toolbar or main toolbar to test various connection types. The supported operations include testing the following connections:
  • Connection to a Microsoft SQL Server or MySQL server
  • Connections to FTP or SFTP servers
  • Connections to POP3, IMAP or SMTP servers
  • Connections to an IRC server
  • Connections to an LDAP server
  • Connections to an Usenet server
  • Generic client or server connections based on IP address / hostname and port.
To start, select one of the available options and enter IP address / hostname and port information, or other required information, to start the diagnosis of the connection. The process may take a while and you are presented with an overview in the end that helps you find out more about the connection failure.

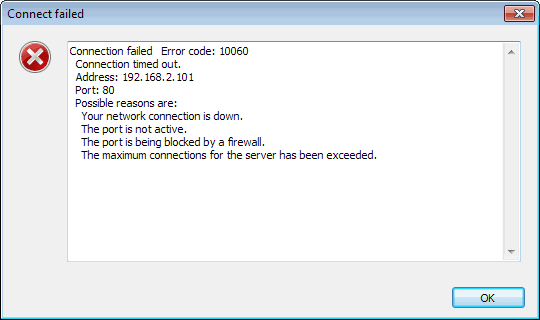
connect failed
Note that this dialog is complemented by a log of all connection attempts and look-ups the program made in the main interface.
If the connection fails, you will receive suggestions why no connection could be established to the selected server.
One interesting option that you have is to create a generic server or client and test the connectivity of the computer using them. This can be useful to make sure that generic connection attempts are not blocked. If they are blocked as well, you can be fairly certain that something is preventing the connection (a firewall for instance), and if the connection goes through, you may want to start looking into the service's configuration to double-check that all parameters are in order.
The advanced menu provides you access to the entire socket process from Bind to Close so that you can go through each step of the process one by one.
Why Can't I Connect supports other features, like bridging, which inserts the application between a client and server so that you can better diagnose connection attempts between the two systems.

Closing Words

Why Can't I Connect is a helpful troubleshooting tool for various operating systems that you can use to diagnose connection issues between client and server system